
Aalto University - ARTS 3D Printing
Delta Wasp Clay 40100
1. Characteristics
Wasp Clay 40100 is a large format Material Extrusion (FFF or FDM) machine that uses clay. Here is a chart where you can review characteristics: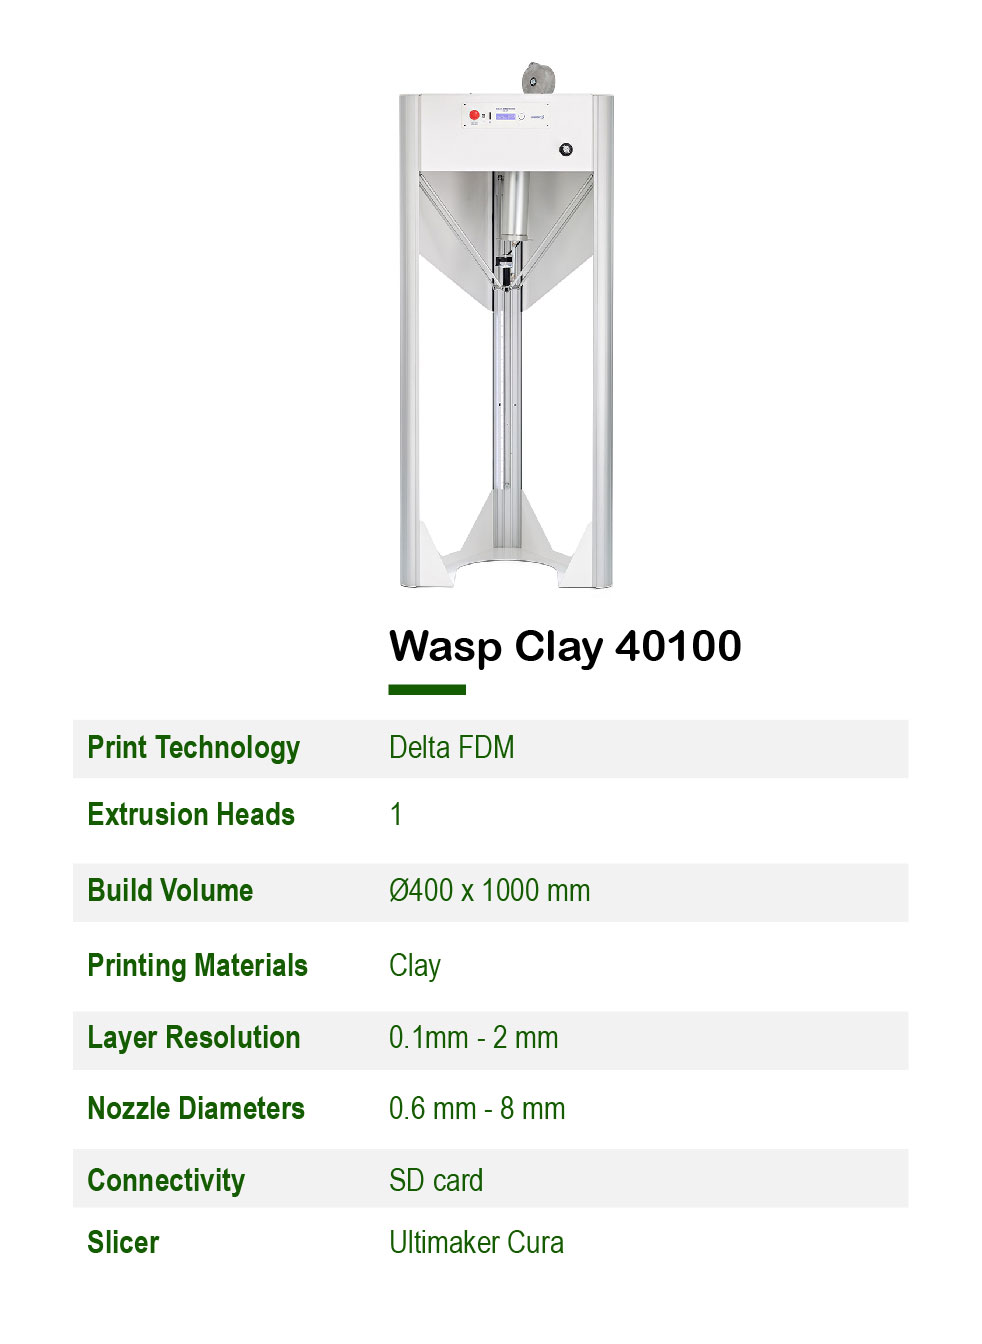
This is a video showing some of the things we can accomplish with this machine:
2. Setting up the machine in Ultimaker Cura Slicer
In order to slice your own models, you should first set up the machine in the slicer. Follow these steps:
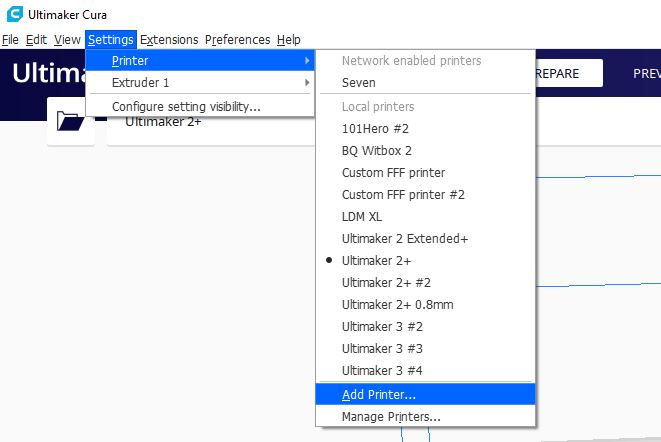
1. In the upper menu, go to Settings>Printer>Add Printer
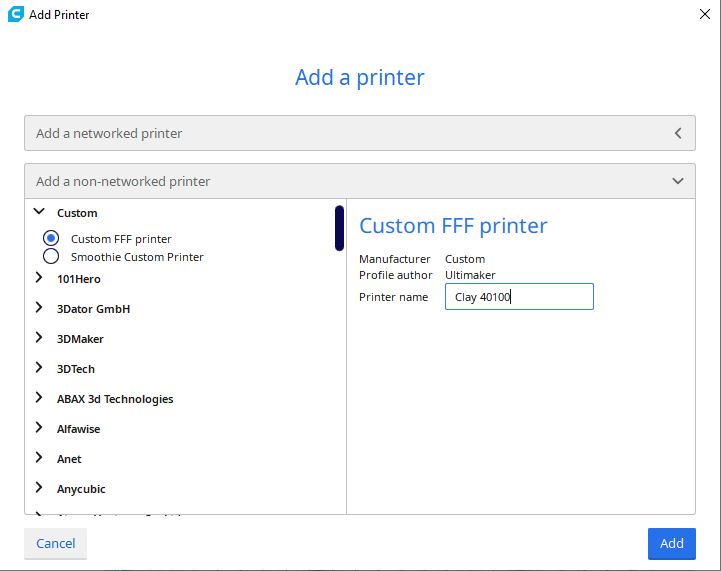
2. Go to Add a non-networked printer>Custom>Custom FFF printer. Change the Printer name to Clay 40100
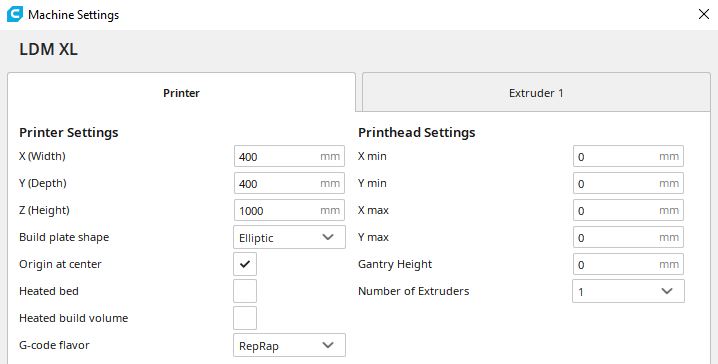
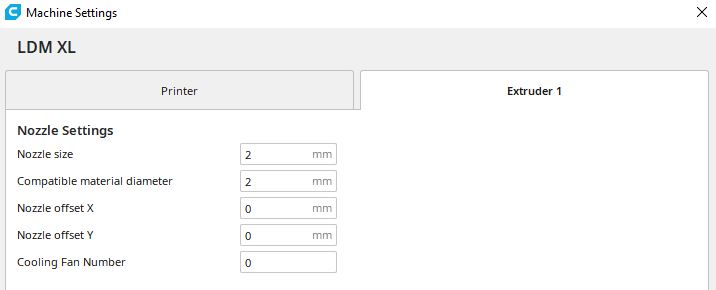
3. In the Printer tab, copy the settings as they are shown in the following image:
START G-CODE
;Basic settings: Layer height: {layer_height} Walls: {wall_thickness} Fill: {fill_density}
G21 ;metric values
G90 ;absolute positioning
M107 ;start with the fan off
G28 ;move to endstops
G92 E0 ;zero the extruded length
G1 F200 E3 ;extrude 3mm of feed stock
G92 E0 ;zero the extruded length again
G1 F{travel_speed}
M117 Printing...
M104 S0 ;extruder heater off
M140 S0 ;heated bed heater off (if you have it)
G91 ;relative positioning
G1 E-1 F300 ;retract the filament a bit before lifting the nozzle, to release some of the pressure
G1 Z+0.5 E-5 X-20 Y-20 F{travel_speed} ;move Z up a bit and retract filament even more
G28 ;move to endstops
M84 ;steppers off
G90 ;absolute positioning
6. Download the following print profiles to your computer: (Click on the links below)
This profiles will give you basic settings for each nozzle. You can also modify them to your liking afterwards.
7. In the upper menu, go to Settings>Printer>Manage Printers and select the tab Profiles.
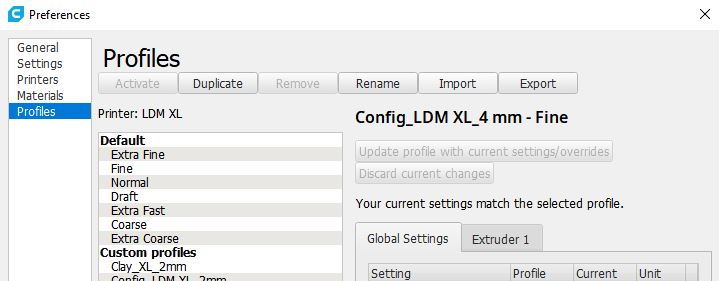
8. Click on Import, and select the profile files you just downloaded and open them.
Now you are ready to slice your file and print them!
3. General instructions and rules
+ Make sure that the extruder nozzle is empty, clean and without obstruction before use
+ Make sure that the two tank caps are tight before the pressurization of the tank
+ Confine long hair or loose clothing before using the machine.
+ Do not exceed the maximum pressure (8 bar)
+ Do not put your fingers inside the extruder
+ Do not ingest any extruded material
+ Do not introduce or place hands or other parts of the body near the moving parts
+ Do not perform modifications or maintenance to this machine without previous approval
BEFORE STARTING
+ Make sure that the nozzle is unobstructed and the building plate clean
+ Check air pressure is connected and open
+ Check distance between nozzle and plate and calibrate ZMAX (Menu>Prepare>Modify ZMax)
+ Wet the plaster plate thoroughly
AFTER FINISHING
+ Leave the build plate clean, the air pressure closed and the nozzle closed or under water
+ Do not load/unload material by yourself