
Aalto University - ARTS 3D Printing
Setting up the printer and printing (Ultimaker 2+ & 3)
Saving your code file
These are the steps after you have sliced your file with your preferred settings:
1. Still in the slicer, verify the amount of printing time and material you will need to complete the print. If for any reason that amount seems unreasonable, please ask the workshop master to check the slicing with you.
2. In Cura, click on <Save to File> and save in in the SD card (Ultimaker 2+) or in the USB-drive (Ultimaker 3) that you will find on every machine.
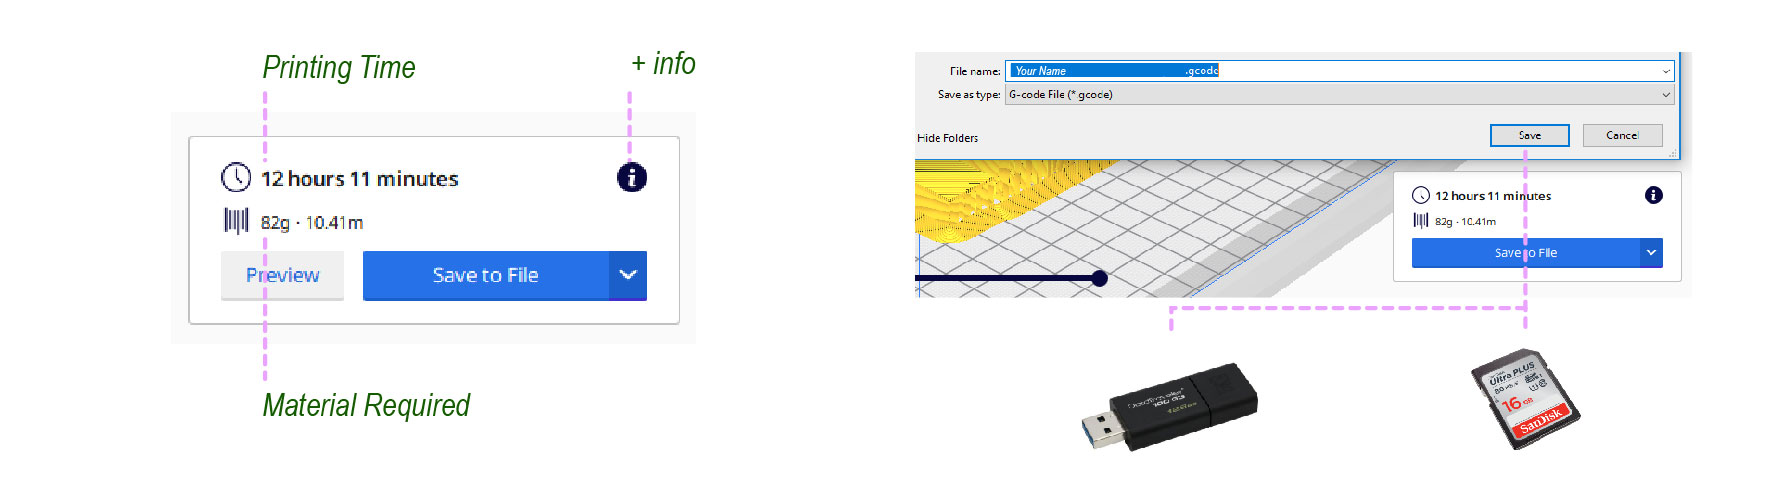
Note: Before removing the USB-drive or SD card from a printer, verify that the last job is finished. If removed while printing something, it might cause the print to fail.
Prepare the printer
1. Go to the printer and verify that the previous job has ended. In case there is a finished job, the machine has cooled down and it is in stand-by, remove the glass from the machine and take out the print carefully with a spatula.

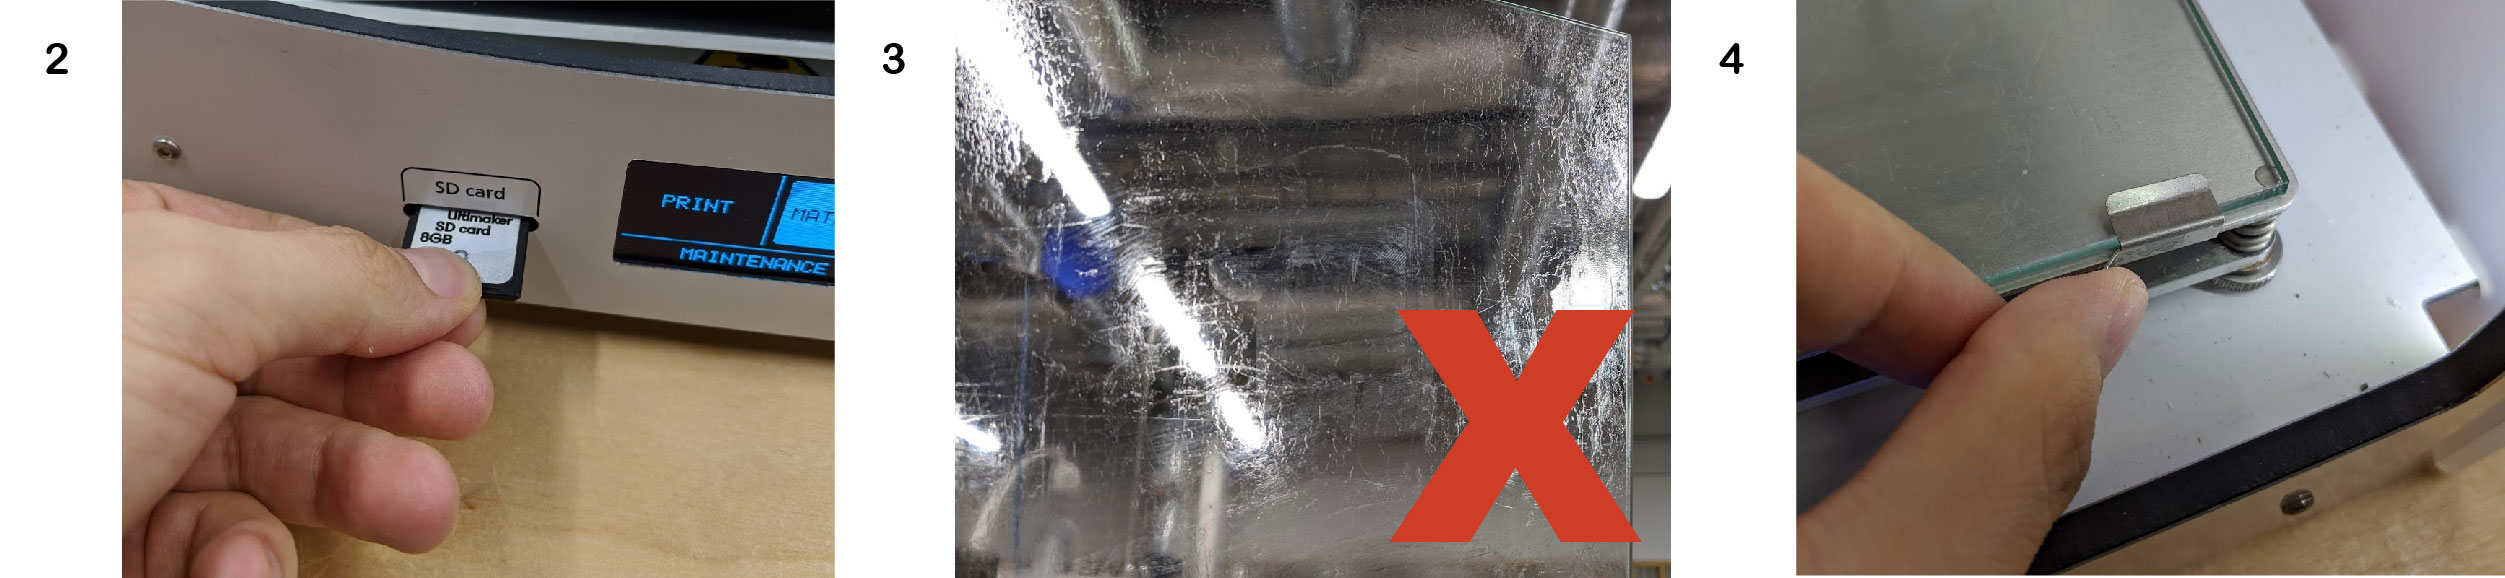
2. Insert the SD card/USB-drive in the slot of the machine.
3. Remove the glass and make sure it is clean. If not, wash it with warm water, soap and a brush.
4. Dry the glass and put it in the machine. Make sure that the clips on the front part are secured.
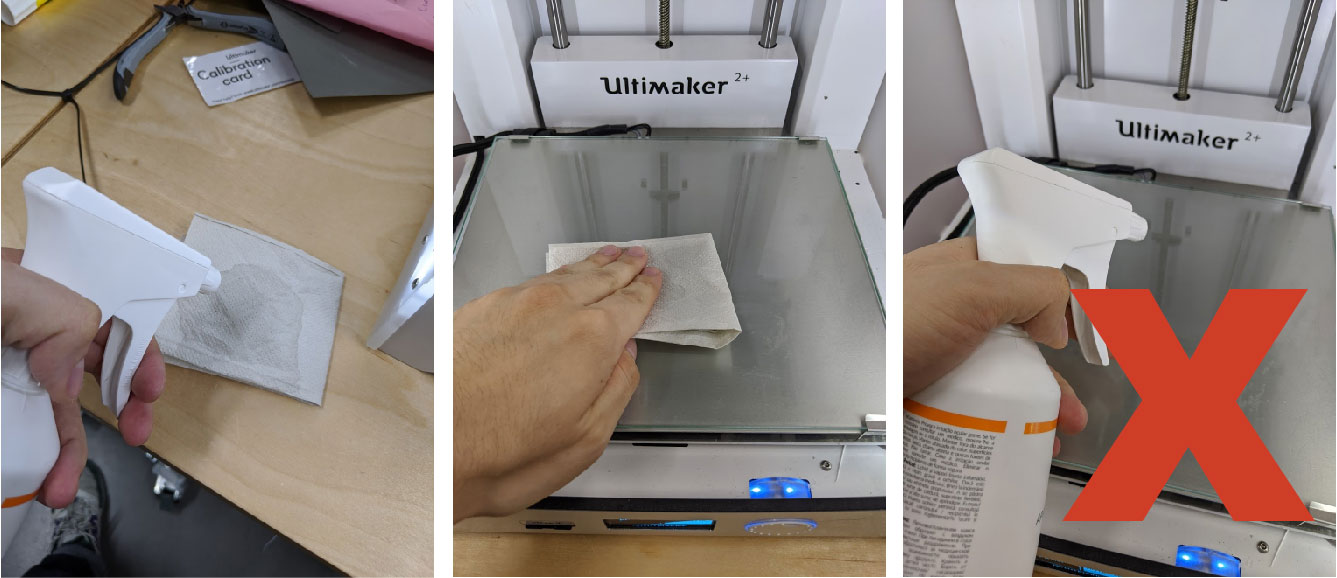
5. Spray some liquid glue onto a paper towel and rub in on the glass. DO NOT SPRAY INSIDE THE MACHINE.
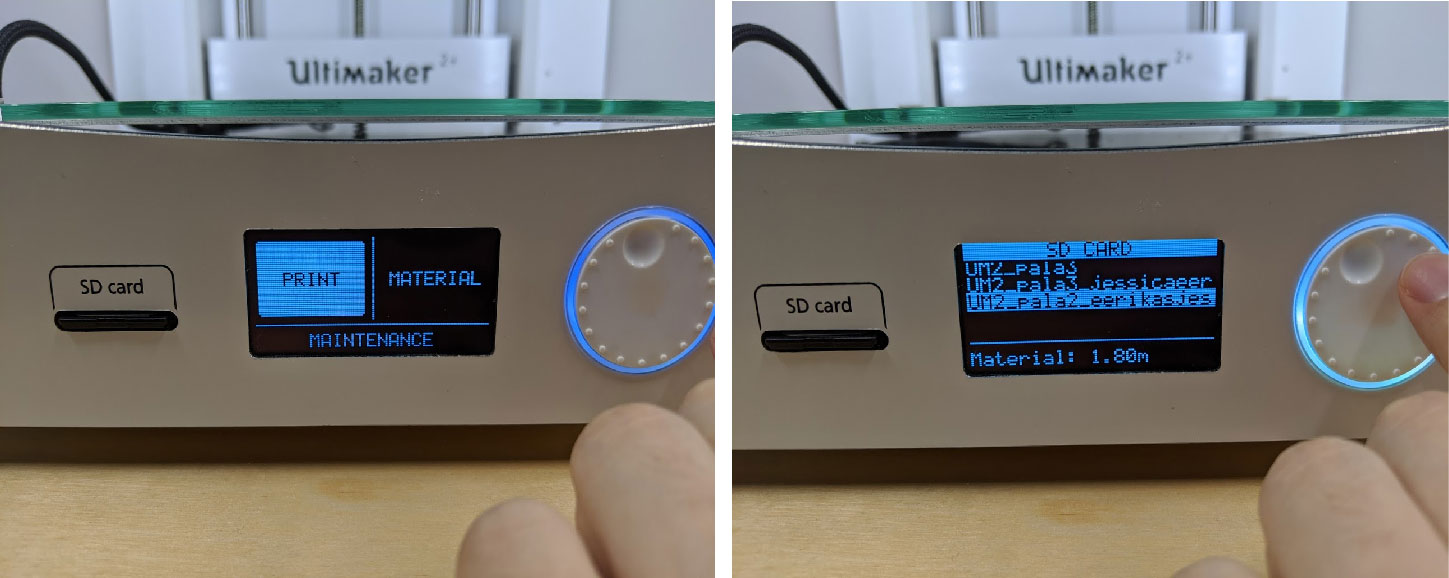
6. With the dial, go to <Print> and select you file
Print!
Make sure your model is correctly attached to the print bed and that there is enough material being extruded. It is important that you stay right next to the machine for the first layer.
If there is no material extruding, or your print is not correctly attached, it might be that there is not enough material to print, or that the bed level needs to be calibrated. Then, go with the dial to <Tune>, press <Abort Print> and <Confirm>